Recently I had some friends ask how I organize my personal photos. You know the problem, cell phone snapshots, “big camera” photos, family photos for the year, all in various folders, platforms, and clouds. Rest easy, my friends, I was there once too. So here’s the bad news, it’s going to be a bit of work at the beginning to get your system set up. Like any good reorganization, it gets messier before it gets amazing. I promise, though, it will be so very worth it when it’s all finished. If you are anything like me, the photo situation is just hanging over your head and it feels so incredibly overwhelming and you don’t even want to start because: too much. On the flipside, you want it finished because: chaos fuels chaos. Here’s the thing, when you know where your photos are living, when you can access them with a few clicks it makes tasks like making photos books, holiday cards, and choosing prints for your walls or grandmas so much easier. I’ve been there; wanting to make Christmas cards but the thought of going through all the files, websites, storage systems to find the photo I’m looking for just feels daunting and not the quick task it could be.
Most importantly, streamlining this process frees up more free time. It also frees more headspace so that you actually want to capture your memories with your camera. There was a point a few years ago where I was all “nope, I’m not taking pictures of [insert everyday adventure here] because I already have a gazillion photos to go through and organize.” Now that my process is so quick, it doesn’t feel overwhelming and I want to capture the everyday moments more often. So let’s free up some of your time and help encourage you to keep capturing all those everyday adventures!
So, take a deep breath. Maybe pour a glass of wine but remember: this doesn’t have to be a day project. If you are someone who has photos all over the place or maybe doesn’t have large blocks of free time (hello every momma, everywhere), do this in manageable chunks. My perfectionist self struggled with this at first because as I was organizing, I was adding more photos and that was super irritating. Don’t get frustrated, just follow these steps, as much or as little as possible at a time, and remember what it’ll feel like once it’s done.
Get organizing!
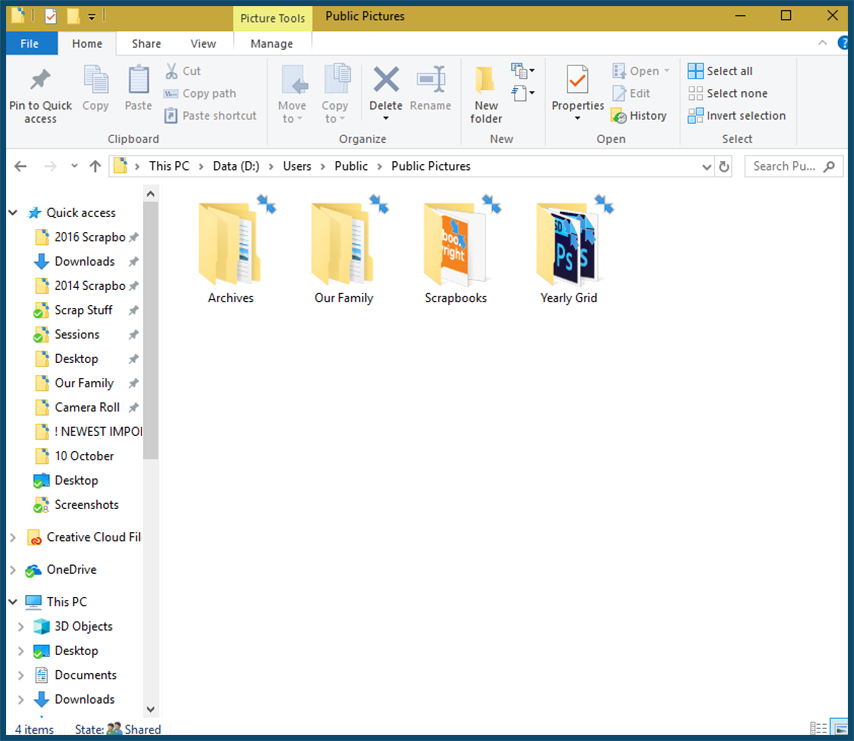
1. Make a (or decide on one that’s already on your computer) “parent” folder. This is just a folder that will house all the photos. Mine happens to be “Public Photos”. I also keep our yearly scrapbooks in this folder as well as a grid of 20 photos for each year (these get framed and hung in our hallway). You can do this either on your desktop or your in your cloud-based system. The point is to put them all in once place. I’ll mention this later but I keep all photos on my desktop. These files are backed up nightly to an external hard drive as well as the cloud. If I only add photos to one place (desktop) I know that those files will be identical to the ones in other places. If I started to add photos only to the cloud, the ones on my desktop wouldn’t match unless I manually moved them. Keeping everything clean and uncluttered is important to me. If you are short on space on your computer, you could keep all archived photos in the cloud and then keep the current ones on your computer (and backed up to the cloud).
2. Make an “Archives” folder. This houses all the years prior to the current year. I do this because our current year of photos is backed up every night to an external hard drive and to a cloud-based storage system. I don’t need previous years backed up every night so I keep it in a separate folder. If this doesn’t matter to you, you could store all the years in the same folder. Again, do what makes sense to you. For the sake of clarity, I’ll assume you added them to an “Archives” folder.
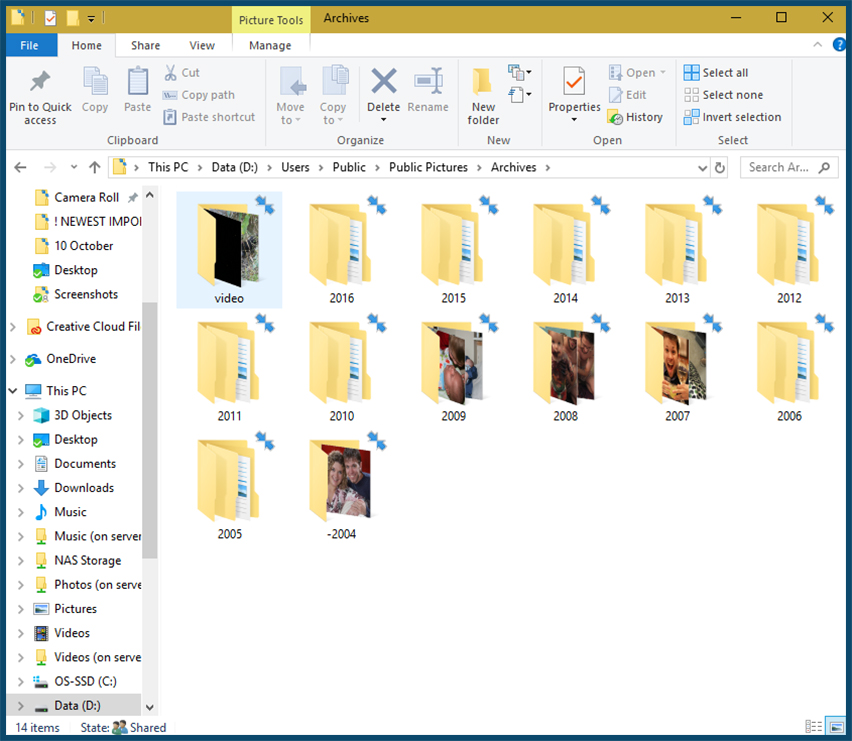
3. Add the years that you have photos for into the “Archives” folder. If you want to also sort by month, make month folders for each year. An easy way to do this is to make a set (January-December) for one year and then copy and paste them into all the other years. If you add the number of the month to the folder name, it’ll help keep them in chronological order.
4. Make a folder for the current year. Maybe you want to name it “Current Year.” I mean that makes more sense than what I named mine: “Our Family”, but it works for me. Add the month folders to this folder as well. I also add a “Newest Import” folder here. If you have a minute to get photos out of the cloud or off your phone but don’t have time to cull (delete photos you don’t want/keep the ones you want), throw them in this folder. This way they are ready to be edited and sorted when you have time.
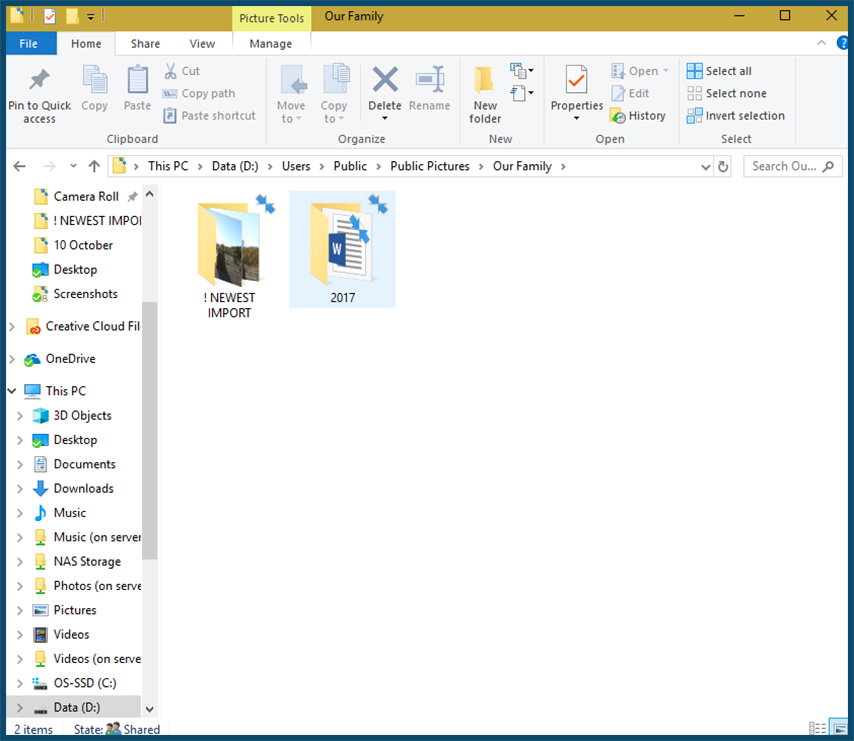
5. If you want, make special folders. I add folders for videos and our professional family photos in each year. If there are certain events that you want in an easy-to-access folder, make a one. Easy-peasy. I’ll talk about the “Journal” Word document you see here in my upcoming post about making your family yearbook.
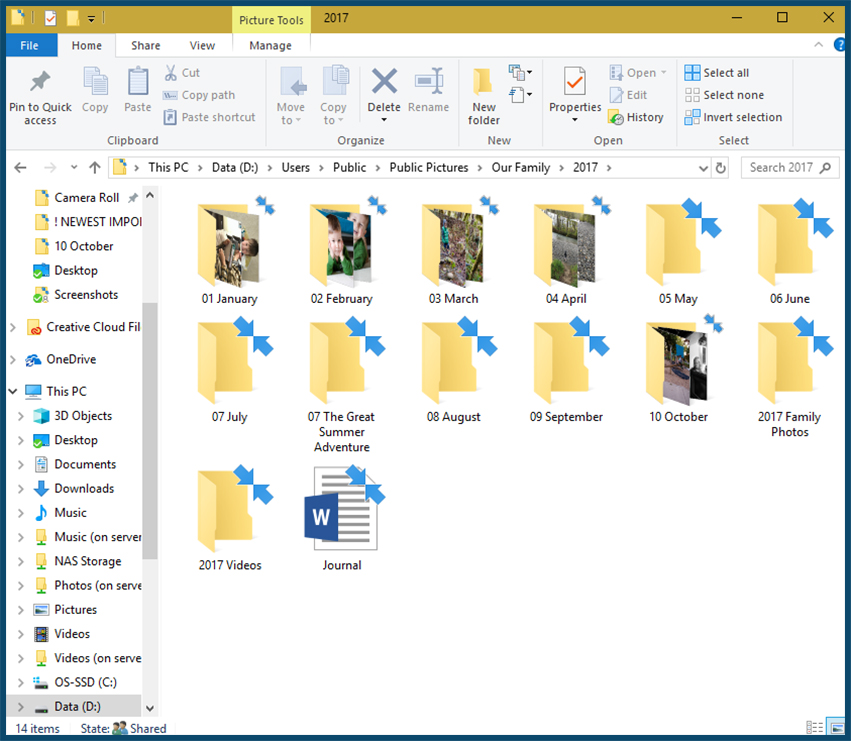
6. Breathe. This is a big step, it might not necessarily feel productive yet – but you’re getting there!
Go get your photos!
1. Find all your photos. Maybe this sounds silly but when talking to my friends I found they upload photos in a variety of ways and to a variety of places. Make a list of where your photos are living. Are they in other places on your computer, a cloud-based storage system (OneDrive, DropBox, Google Photos, iCloud), a photo site (Shutterfly, PhotoBucket)?
2. Get your photos all living in one place. There are a few different ways that you can go about doing this, depending on how your brain works best.
Option A. You can make an “Unsorted Photos” folder on your desktop (or cloud-based system). You will put all photos in this folder and then sort them into the years and months. This is the quicker option in my opinion, especially if you are getting photos from a site like Shutterfly that will send you a .zip file. Put all your photos into this one folder.
Option B. Organize directly into your newly made folders. Download or move sets of photos and put them directly into your year or month folders.
Hints for sorting:
1. Have two windows open at once. This makes things super quick. On Windows, when you have one of your folders open, click File>Open New Window. Boom. Want to make them split between the screen evenly (what you’re not this OCD?). While working in a folder, hold the Window Key and hit the left arrow. Click into the other window you opened. Now do Window+Right. Double Boom! Dragging has never been easier.
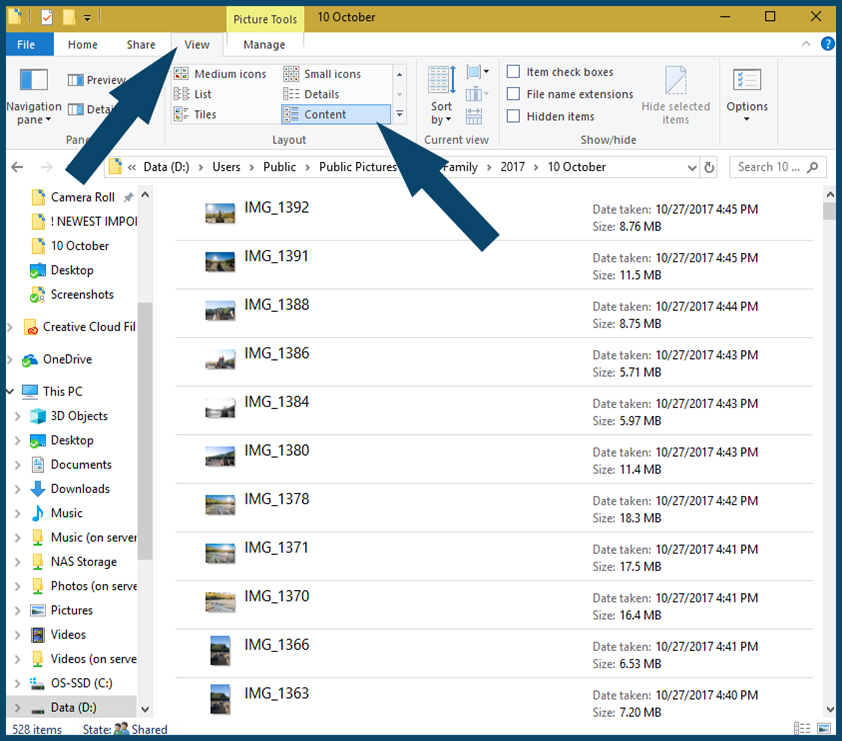
2. You can sort by “date taken.” On Windows, when you are in the folder, select the “View” tab. You’ll see a “Sort by” menu. Clicking this and then selecting “date taken” will sort them by, you guessed it, the date they were taken. Click the first photo from the year or month you are wanting, scroll to the last one, hold Shift, and click again. This will select all the photos in between and you can move the entire set at once. Bonus! If you use the “Content” view, you get to see a thumbnail and the date which makes it super easy to sort.
Tips for keeping up the good work:
You did it! Yes! All your photos live in one place, they are organized and ready to actually use. What are some ways you can keep your system working for you?
1. Get your photos off your phone/camera regularly. If you made a “Newest Import” folder, you are one step closer to being organized. I move sets of photos into that folder to make sure they are at least on the computer. I can quickly move photos from my phone (or from the cloud where my phone photos end up) or from my camera card when I have a minute or two. When I have a block of time (thank you, preschool!), I go through and decide which ones to keep and which ones to delete. Which brings me to:
2. Cull your photos. I do not keep all my photos. If I’m not going to print them for the wall or a photo book, they are deleted. With that said, I put A LOT of photos in each of our yearbooks. I’m not going to waste precious time editing photos that won’t live anywhere but on the computer. All photos that I want to keep or I want my boys to have one day, go in our photobooks. Plus, they are all digitally backed up. I don’t want it to be a nightmare for them to look through photos when I’m gone. I want the ones that matter archived and kept safe. Not the ones with my finger in front of my phone lens, or the photos I used to test lighting, or all 50 of the same shot with subjects just slightly in different positions. Keep what matters, toss what doesn’t. I’ve heard this is hard. I’ll tell you it’s freeing!
Phew! You guys, if you made it all the way through this, congrats! If you actually did it all, YOU’RE SO AMAZING (in my best Moana voice). I know that this can seem overwhelming. I totally get it. Here’s the thing, though: You are freeing up time and energy for the rest of your digital photo days. No more panic when the teacher asks for a picture from your summer vacation. No sweaty palms when you need to print your holiday cards. Now you can whip through all those photo related tasks without spending 2 hours just finding the photos you need. AND, hopefully, you’ll have more time and willingness to create more memories (and, of course, document them because the baby doesn’t snuggle like that forever and the mess the vacuum made falling down the steps as the toddler pulled the cord is a moment you’ll want to look back on). You can do this! If you have any questions, leave me a comment and I’ll try to help as best I can. I’d love to hear how you keep your digital photos organized!


Great tips, I always have such a hard time narrowing it down to my favorites!
-Ashley
These are awesome tips! I’m going to send this post to my mom. Most of my devices are set up to a cloud network so I can access them pretty easy and are really easily stored. Though, cloud networks do come with their own drawbacks.
these tips are great, i used to be super organized but now my desktop in teh laptp is full of folders and pictures… should follow your tips!
xx
lau
http://www.malibluemymind.com
This was so great! I love to stay organized but can get so overwhelmed with the amount of photographs I have on file. Thanks for sharing!
I hear you! I’m glad these steps can help!
Great tips! Until recently, I used to just dump all the photos together. But now I have started organizing them year – event – place wise. It is so much easier to find what you are looking for. Also, becomes easy to clear up camera space!
– http://www.allshethings.com
Yes! So true. Getting organized feels like the biggest part of the battle 🙂
I really need to this! I have all my pictures all over my laptop. These are great tips!
You can do it! It is not a super fun process but it feels soooo good to have it all organized. Good luck!